Selecting a Mapping Area
You might want to bear in mind the following:
- Students who do their projects in the British Isles often get a better final mark: this may be in part because it looks like you’ve selected your mapping area for its geological challenges rather than its climate, but also perhaps because you have a better basic understanding of the regional geological history from the course, and groups who go abroad tend to map boring stuff (see below).
- A mapping area containing only a few simple folds/faults and seven different types of limestone is both boring and likely to limit your final mark. A variety of rock types gives you more to talk about in your write-up without it getting repetitive, and plenty of structural complexity allows you to go to town on making useful measurements, drawing cross-sections, and coming up with detailed interpretations. Obviously too much complicated stuff is a bad idea, particularly if the exposure is poor.
- There are plenty of amazing places in Europe with challenging geology that have yet to be chosen by second-years, not to mention further afield (although check with the Chair of the mapping committee before getting too enthusiastic about going outside of Western Europe). If you aren’t particularly imaginative, the more rock-minded members of the faculty have plenty of ideas.
- Try to go somewhere that you think you will enjoy living for 5/6 weeks, and with the people you are most likely to be comfortable living and working with for that time (not necessarily the people you socialise with most): getting this right/wrong makes a huge difference to your mapping experience.
- Many undergraduates choose to go to areas that have already been mapped before because these areas there is additional information provided by past students about the logistics, costs, safety concerns of mapping these areas as well as the rock types within these regions. To find out details about some of the areas that past undergraduates have mapped, click here.
Before Mapping
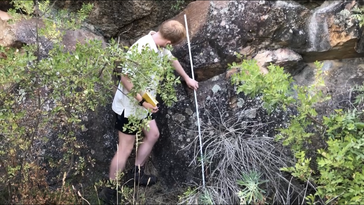
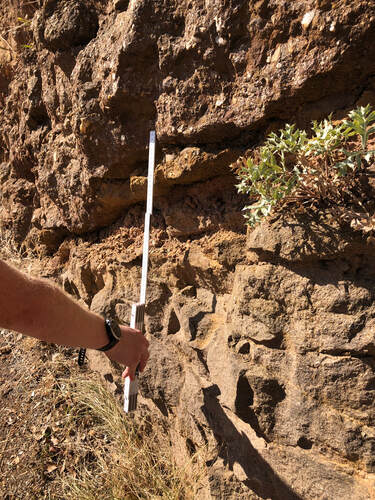 A student taking measurements of various different bedding structures to be compiled into a lithological log of this outcrop along with their qualitative observations.
A couple of tips about preparation:
- The relationship between small-scale folding/cleavage and larger-scale structure
- Terminology for and classification of folds
- How to measure strain
- Construction of balanced/restored cross-sections.
- Read your structural geology lecture notes: if you don’t, when you read them afterwards for revision, you will wish you had! Look particularly at things such as:
- The relationship between small-scale folding/cleavage and larger-scale structure
- Terminology for and classification of folds
- How to measure strain
- Construction of balanced/restored cross-sections.
- Rich Walker’s lecture notes are pretty good, but if there are bits you don't understand, try reading ‘Structural Geology’ by Twiss & Moores, and definitely take copies of ‘The Mapping of Geological Structures’ by K.R. McClay and ‘Basic Geological Mapping’ by Barnes & Lisle into the field (they are deliberately pocket-size) and use them!
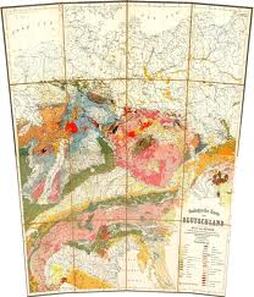
- Read some of the literature on your mapping area (including perusing published maps), both papers that give the regional context and more specialised studies, if they exist. This is just to give you an idea of what to expect (and possibly the best places to look for interesting outcrops); don’t let previous studies influence your interpretation: in most cases, published works will not have studied your area in the level of detail that you will, so trust your own observations. Having an idea of what minerals, structures, types of rocks, sediments or even fossils you might expect to find in your area, however, might help you get your eye in a lot earlier on.
- Ensure you take plenty of spare fieldslips, and also prepare some for areas outside of your planned mapping area, in case you decide to modify the boundaries.
- Brush up on your field sketching skills - practice drawing and labelling sketches quickly and concisely, whilst still ensuring that they are informative!
During Mapping
Spend the first couple of days doing a reconnaissance of your mapping area; try to get through the whole stratigraphy to get a feel for the rock types, how obvious the formation boundaries are, etc.
- When you get on to proper mapping, approach it as a scientific exercise, in the sense that you should use the exposure you observe to hypothesise what you will observe along strike, or along the path, etc.: if you find something ‘unexpected’, then you refine your interpretation, and make new predictions. Try to articulate such thought processes in your field notes, by comments such as 'unexpected from orientation of outcrop at L.5.4 – crossed normal fault?'; this shows that you are thinking about interpretation in the field, not just making something up once you've got lots of pretty colours on a fieldslip (in spite of being called ‘mapping’, it is not a purely cartographic exercise).
- Feel free to lump together some units (especially if interbedded), but keep it sensible (e.g. don't classify a sill in with the surrounding sedimentary rock!); remember the definition of a formation (essentially a mappable sequence), and be sure to define formation boundaries. You should be mapping formations, but bear in mind the individual units so you can make stratigraphic logs (if you have the exposure) and so that you know where you are within the formation at any outcrop (for example, you want to know if you're close to the formation boundary, so you can constrain your inferred contacts).
- Just name formations by what you think they are, e.g. 'ophicalcite' or 'white limestone', or 'quartziferous metapelite', but ensure that the name is specific enough to not be confused with another.
- Take as many measurements (strike, dip, trend, plunge etc.) as possible; give lineation and cleavage as much attention as you do bedding planes. Try to find time to draw up a couple of stereoplots, to verify that quantitative analysis of your data is consistent with your developing qualitative interpretations.
- Notebooks and fieldslips really do need to be neat: it's specifically mentioned in the marking criteria (presentation has been criticised by the external examiner in the past). Regarding notebooks:
- Take note of the advice about notebooks in Barnes & Lisle and, given that Oxford doesn't have a 'house style', set everything out however you think works best for you, but bear in mind that it should be clear for the examiners
- The best notebooks 'tell a story' and, in marking scheme speak, are suitable for use by another geologist in the field: consider writing things such as ‘continuing along strike’ so, in theory, the examiner could use your notebook as a field guide
- Make a note at the start about which system your grid references refer to (e.g. UTM32) and the magnetic declination for which all your direction measurements are corrected for
- You can never draw too many fieldsketches (if you’re pressed for time and/or useless at drawing, do rough outlines then finish off from photos when you have time), but ensure that all fulfil the OASIS rule; detailed annotations are essential
- Choose a systematic layout (e.g. measurements in a column on the right hand side, GPS and time for each locality, etc.) and consistently follow it
- I found it extremely helpful to put the ‘initials’ of the formation (in the colour of that formation on my fieldslip, e.g. NL for ‘nummulitic limestone’, if red on my fieldslip) to which an outcrop belongs in the margin next to my notes for that locality. This makes finding your notes on the nature of the x-y contact much easier when it comes to describing it in your report, for example
- Leave space for 'contents pages' at the front, where you should list where you mapped on each day and which pages the notes are on, and give lists of your figures and samples collected
- Write day summaries, and use them as an opportunity for detailing interpretations, particularly how you've reinterpreted things as a result of the day’s observations. Sketch diagrams of the structural evolution, cross-sections, etc. are all useful here (if not done during the day), and listing objectives for the following day at the end shows that you’re identifying problems to tackle rather than just mapping for the sake of it.
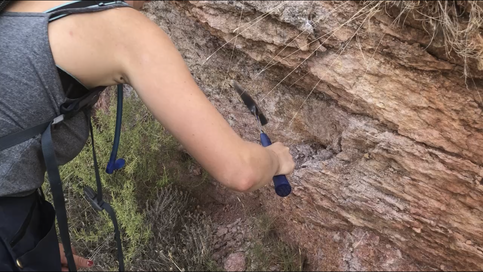 Hammering off a small chunk of rock at an outcrop to be used as a hand sample of this particular unit. This sample can be taken back to Oxford to be further analysed in the lab, including being made into a thin section.
- Don't have blind faith in your GPS: check that where it places you is reasonable, particularly if you're close to another marked location; try to pace between outcrops and take bearings (and write them down) if there is any doubt.
- In addition to the general mapping and mapping structure books, there are books on field study of sedimentary (M.E. Tucker), igneous (Thorpe & Brown) and metamorphic (N. Fry) rocks, which might be worth having for reference; they include guidance on how to systematically describe each rock type, which you need to do and then use in order to give a formation a field classification (i.e. a name).
- Describe a formation in detail from a decent outcrop that is representative of the formation (i.e. suitable for labelling as the ‘type locality’), not just the first exposure of it that you find!
- Try to draw sketch cross-sections whilst mapping, as this helps a lot with figuring out the structure and identifying parts of your mapping area that need more attention.
- Consistency is essential, between notebooks, fieldslips and your final map, and in how you set out your notebooks and maps; when you change interpretations, rock classifications etc., make it very clear in your notebook.
Final Map
|
Basically, the more like a professional map this is, the better: this can be achieved using Adobe Illustrator (even with no prior experience) with a lot of hours of mind-numbing work. Traditional geologists (read: the examiners and some PhD interview panels) seem to have a soft spot for a well-made map, so this is almost certainly worth the effort. If your area is structurally complex (and if you have time), you might want to also produce a separate structural summary map, with stereoplots, balanced cross-sections, and photographs. Consider including the following (non-essential stuff) on your map (as well as the standard map things, such as stratigraphic columns and cross-sections):
If you're completely new to Adobe Illustrator, make sure to check out this playlist of mini tutorials. Each video teaches you little tips and tricks for how to use this software to digitise your geological map and make it look more professional. A great tool for digitising your stereoplots as well as helping to visualise your structural data in three-dimensions, is a program called Stereonet 11 which can be downloaded here for free. |
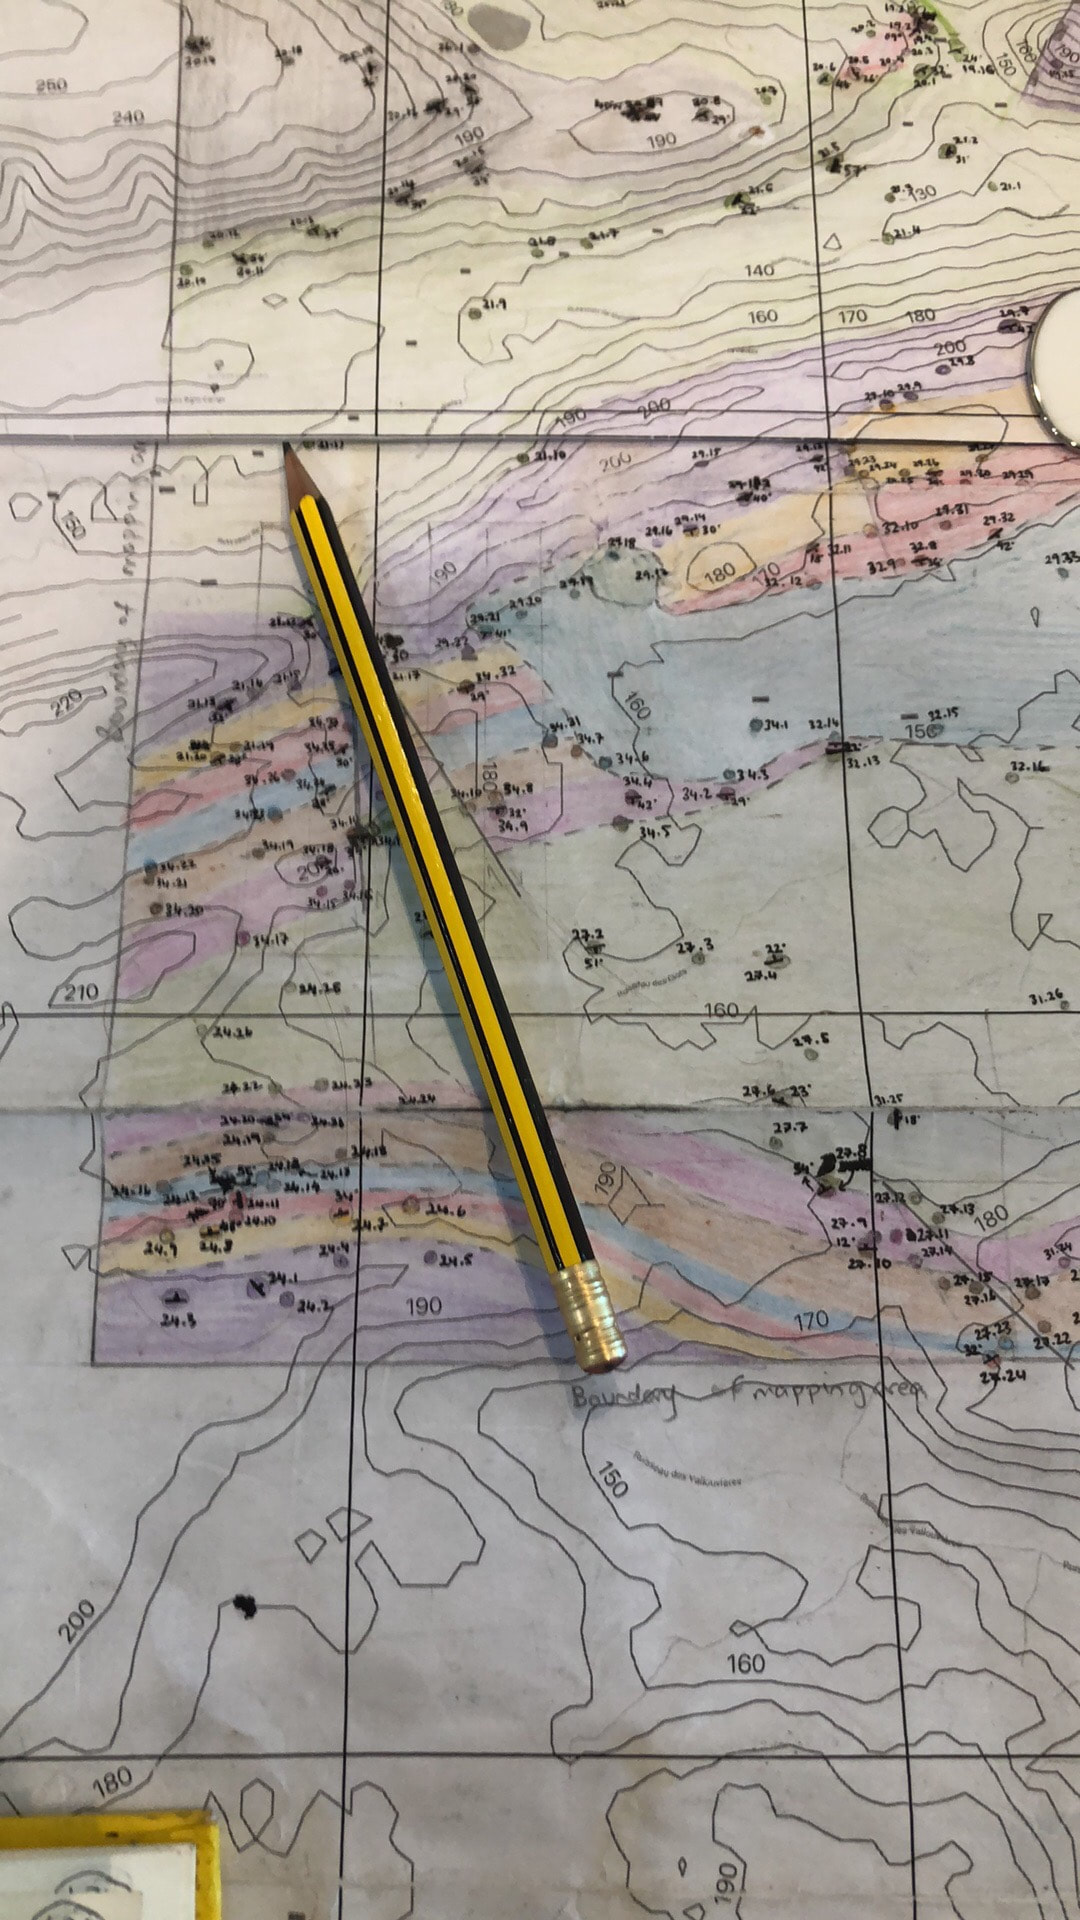
A rough field slip including the locations of the outcrops visited and a first approximation of how the different units observed in the region might fit together.
|
Report
 A student measuring the thickness of some very thick sandstone beds during their mapping project fieldwork.
Consider including the following:
A clear structure to the report is essential: use the chapter numbering system favoured by most journals, and give some thought to how best to divide it up. For example, if your mapping area contains multiple nappes with contrasting rocks, it may be sensible to discuss each nappe in separate chapter (talking about the lithologies and structure within in sub-chapters), rather than the conventional one chapter on lithologies, one on structure, etc
Advice on figures:
- A brief description of the project (where mapping, who with, and why)
- A brief description of the geography of the area (location and topographic maps, and descriptions of the nature of the topography, access, and quality of exposure, i.e. the sort of details in ‘field guides’)
- A detailed description of the regional geology (esp. geological history), followed by an outline of the geology of your mapping area (to introduce the rest of the report)
- Section(s) on the stratigraphy, including lithological descriptions of each formation; take particular care to define the formation boundaries and describe interpretations (of the genesis of the rock, etc.)
- Discussion of the structure of the area; include stereoplots, photos picking out structural features, and schematic diagrams of the structural evolution (e.g. of the phases of folding), and/or an overall structural model: remember to relate your interpretations to the regional geological history
- A synthesis/geological history of the mapping area, with clear discussion of the relationship to the regional geology.
A clear structure to the report is essential: use the chapter numbering system favoured by most journals, and give some thought to how best to divide it up. For example, if your mapping area contains multiple nappes with contrasting rocks, it may be sensible to discuss each nappe in separate chapter (talking about the lithologies and structure within in sub-chapters), rather than the conventional one chapter on lithologies, one on structure, etc
Advice on figures:
- Ensure any figures containing photos have the appropriate grid reference (location from which a ‘landscape’ photo was taken, or the location of the outcrop or from which the specimen/thin-section photographed was taken)
- The OASIS rule applies to figures just as it does to fieldsketches, particularly the emphasis on annotation
- Be careful to only include relevant figures, and refrain from including interpretation (or anything you definitely want the examiners to read) in the annotations or captions.
|
Ideas for figures:
|
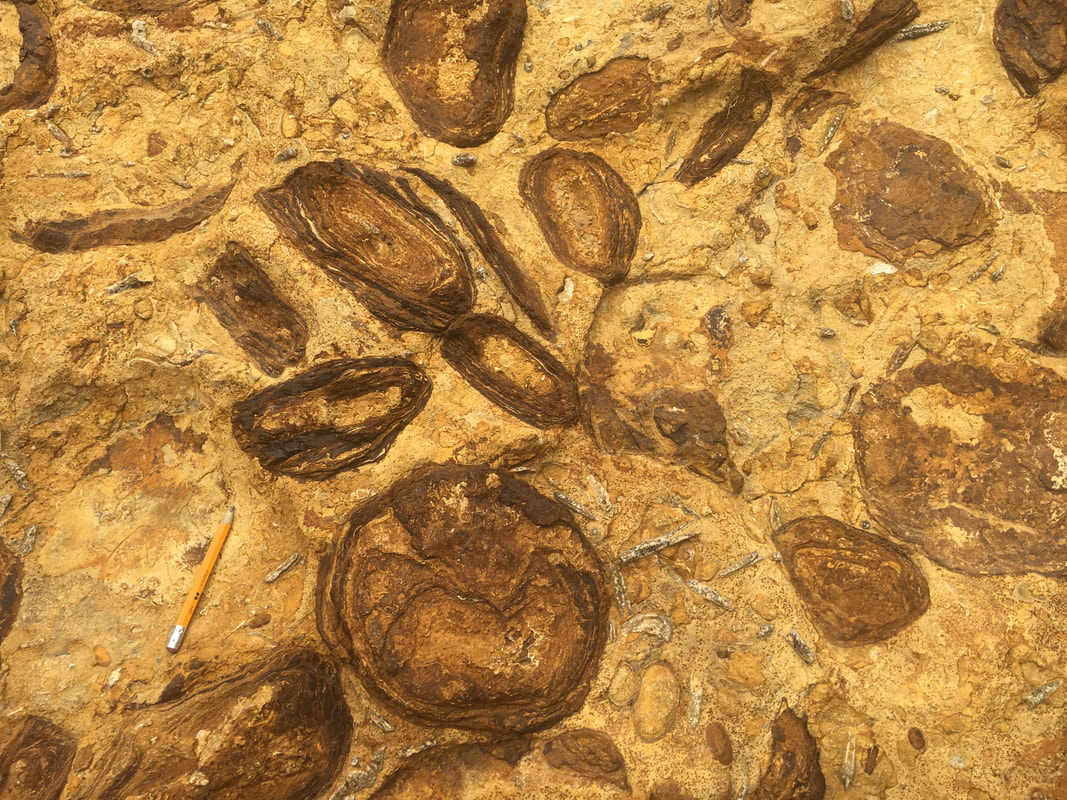
Oncoids (concentric structures) and belemnites (bullet-shaped fossils of squid-like creatures) from a Jurassic limestone (c. 170 million years ago).
|
Tricks to get below the word limit:
- More figures = more figure captions and annotations!
- Present the geological history as a flow diagram, or some form of table; the overall structure could be presented in a similar way, or as some kind of schematic model
- Put a detailed stratigraphic column in your report, showing units/members in the formations, with descriptions of the lithologies as ‘annotations’ (but you will still need some description and discussion of the lithologies in the main body of the report)
- Put detailed descriptions of your samples and thin-sections in your notebook, after your field notes; if the examiners can be bothered to read it, it’s there!
Overview of the mapping project
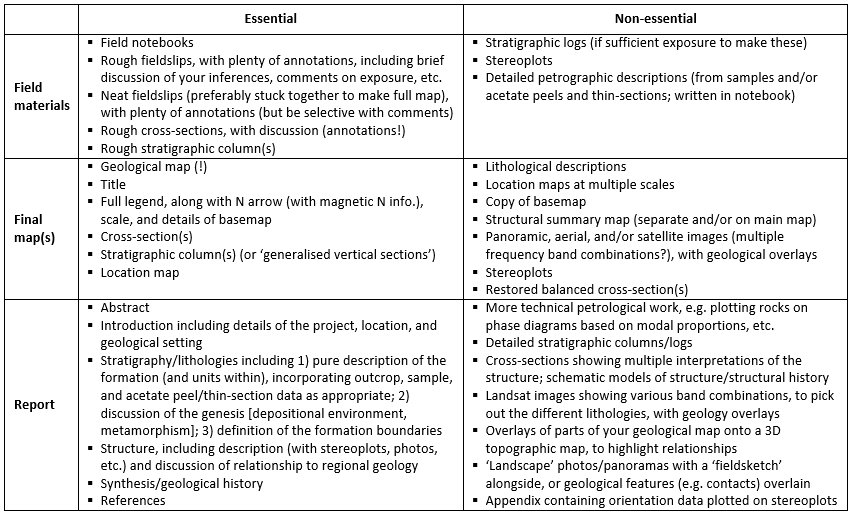
The table below summarises what is pretty much essential in your project, and some stuff that would be good to do if you have time, which would help to differentiate your work from the rest (hopefully resulting in a higher mark). If you can think of innovative additional ways to present your data and/or interpretations, trying to include those will probably also be beneficial.
|
Copyright © 2020 Oxford University Geological Society
|
